
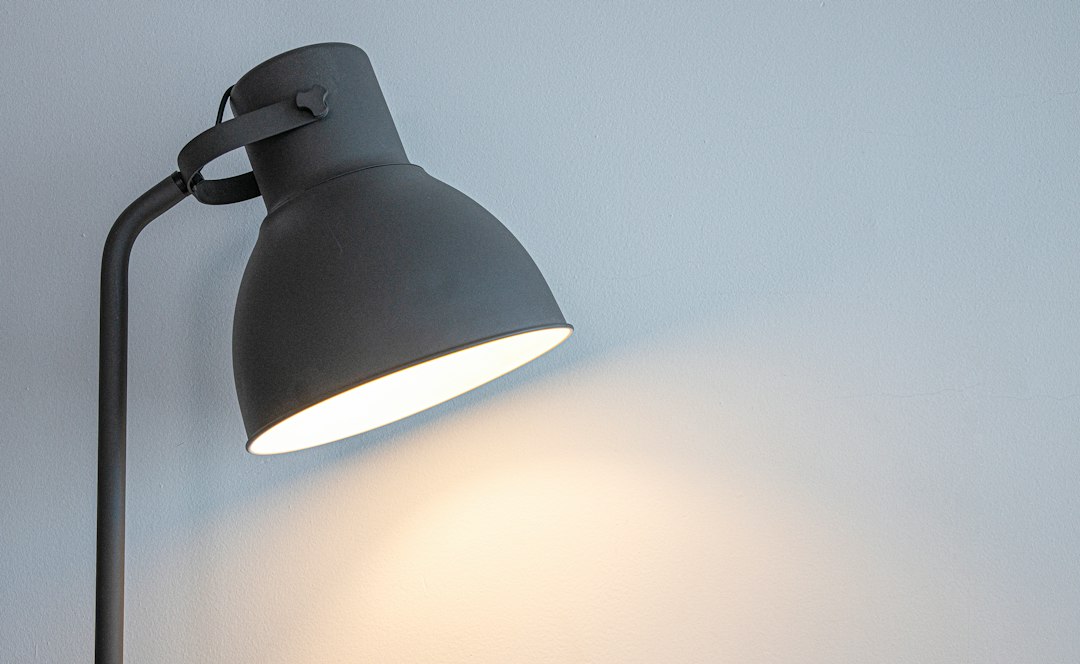
When your bedside wall lamp starts acting up, it’s usually due to a few common culprits: a loose connection, a faulty bulb, or sometimes a slightly more complex wiring issue. The good news is, many of these problems are quite fixable with a bit of patience and the right approach, often saving you the hassle and cost of buying a whole new fixture. Let’s dig into what typically goes wrong and how you can often get things glowing again.
Understanding Your Bedside Wall Lamp
Before we jump into fixing things, it’s helpful to quickly understand the basics of what makes your bedside wall lamp tick. Most of these lamps, whether they’re hardwired into your home’s electrical system or plug into an outlet, consist of a few key components: the light bulb, the socket it screws into, the wiring that carries electricity, the switch to turn it on and off, and the fixture itself that houses everything and attaches to the wall. Knowing these parts helps you pinpoint where a problem might be lurking.
Common Lamp Types and Their Quirks
While the core components are similar, different lamp types can present unique challenges. Hardwired lamps, for instance, are permanently connected to your home’s electrical system and usually have a wall switch controlling them. Plug-in lamps, on the other hand, offer more flexibility in placement and often have an inline switch on the cord or a rotary switch on the fixture itself. Integrated LED fixtures are becoming more common; these can be trickier to repair as the LEDs are often soldered directly onto a circuit board and not easily replaceable by a user. Understanding your specific lamp type will guide your troubleshooting steps.
Safety First: Always Disconnect Power
This isn’t just a suggestion; it’s a non-negotiable step. Before you touch any wiring, any socket, or even change a bulb if you suspect a deeper electrical issue, always disconnect the power. For plug-in lamps, simply unplug them from the wall. For hardwired lamps, you’ll need to go to your home’s electrical panel (breaker box) and switch off the circuit breaker that supplies power to the lamp. If you’re unsure which breaker it is, it’s always safer to flip the main breaker to your entire home or at least the breaker for the room you’re working in. Test the lamp with a non-contact voltage tester or by trying to turn it on after flipping the breaker to confirm the power is off. This simple step can prevent serious injury.
Common Problems: When Your Light Doesn’t Shine
When your bedside lamp stops working, it’s easy to jump to the worst conclusion. However, most issues fall into a few recognizable categories, ranging from the super simple to the slightly more involved.
The Bulb Blues: First and Easiest Check
It might sound obvious, but a dead bulb is by far the most common reason a lamp stops working. Before you pull out any tools, try replacing the bulb.
Checking and Replacing the Bulb
Unscrew the old bulb and screw in a new one that you know works (test it in another lamp if you’re unsure). If the new bulb lights up, great! Your problem is solved. If it doesn’t, or if the old bulb looked burnt out (darkened glass, broken filament), then you’ve confirmed the bulb was at fault. Sometimes, bulbs can look fine but still be dead. It’s always worth trying a replacement.
Loose Bulbs and Connectivity Issues
Occasionally, a bulb just isn’t screwed in tightly enough. Give it a gentle but firm twist to make sure it’s making good contact with the socket. If it was loose, it might just start working. Also, sometimes the small metal tab at the bottom of the lamp socket can get flattened over time, preventing good contact with the bottom of the bulb. With the power off, you can gently pry this tab up slightly with a small screwdriver or a non-conductive tool to improve contact. Be very careful not to bend it too far or damage it.
Flickering Frights: Intermittent Power
A flickering light is annoying and can be a sign of a few different things, from a loose connection to a faulty bulb or even a worn-out switch.
Loose Connections Within the Fixture
With the power off, carefully inspect the wiring inside the lamp fixture. Look for any wires that appear loose, frayed, or disconnected from their terminals. Tighten any screw terminals that hold wires in place. If you see a wire nut, give it a gentle twist to ensure it’s secure. Sometimes, just the vibration of daily use can loosen these connections over time.
Faulty Bulb or Dimmer Compatibility
Sometimes, a flickering bulb is just a dying bulb. Try replacing it. If you’re using a dimmer switch, ensure that your bulbs are “dimmable” compatible. Using non-dimmable bulbs on a dimmer switch can cause flickering, buzzing, and shorten the bulb’s lifespan. Also, cheap or incompatible LED bulbs can sometimes flicker even without a dimmer.
No Power At All: Total Darkness
If your lamp is completely dead – no flicker, no faint glow – then you’re looking at a power delivery issue.
Checking the Wall Outlet or Circuit Breaker
For plug-in lamps, plug another working appliance into the same outlet to ensure the outlet itself has power. If the other appliance doesn’t work either, check your home’s electrical panel for a tripped circuit breaker. Flip the breaker completely off and then back on again. If the outlet works with other devices, then the problem lies within your lamp or its cord. For hardwired lamps, a tripped breaker is a strong possibility if other fixtures on the same circuit are also dead.
Damaged Power Cord or Plug
Inspect the power cord (for plug-in lamps) for any visible damage – cuts, frays, or pinched spots. These can interrupt the flow of electricity. Also, check the plug itself for bent or loose prongs. If the cord or plug is damaged, it’s generally best to replace the entire cord assembly. This is often a straightforward repair for someone comfortable with basic wiring.
Internal Wiring Issues
If none of the above are the culprit, the issue could be internal wiring within the lamp fixture itself. This requires a more detailed inspection. With the power off, carefully open up the lamp (if possible) and look for any dislodged, corroded, or burnt wires. Pay close attention to connections at the switch and the socket.
Troubleshooting Specific Components
Now that we’ve covered general problems, let’s zoom in on specific components that often fail and how to address them.
The Lamp Switch: A Common Point of Failure
The switch is one of the most mechanically active parts of your lamp, making it susceptible to wear and tear.
Testing the Switch for Continuity
To properly test a switch, you’ll need a multimeter. With the power off and the switch disconnected from the lamp’s wiring, set your multimeter to continuity mode. Touch the probes to the two terminals of the switch. In the “on” position, the multimeter should beep or show a reading close to zero ohms, indicating continuity. In the “off” position, it should show no continuity (open circuit). If it doesn’t perform as expected, the switch is faulty and needs replacement.
Replacing a Faulty Switch
Replacing a lamp switch is usually quite straightforward.
- For inline cord switches: Cut the cord where the old switch is located. Strip a small amount of insulation from the ends of the cord, taking care not to cut the internal wires. Follow the instructions provided with your new inline switch to connect the wires. Most inline switches simply require you to connect one wire from each side to the switch’s terminals and then reassemble the switch housing.
- For rotary or push-button switches on the fixture: With the power off and the fixture disassembled, carefully note how the existing switch is wired. There will usually be two wires connected to it. Disconnect the old switch and connect the new switch in the exact same manner. Ensure all connections are secure.
The Lamp Socket: Where the Bulb Meets the Power
The socket is crucial for transferring power to the bulb. Problems here can manifest as flickering, no power, or even sparks.
Inspecting for Damage and Corrosion
With the power off, carefully inspect the inside of the socket. Look for any signs of corrosion (greenish or whitish buildup), discoloration (burn marks), or physical damage (cracked porcelain, bent metal tabs). Corrosion can impede electrical flow, and damaged sockets can be unsafe.
Fixing a Flattened Center Contact Tab
As mentioned earlier, the small metal tab at the bottom of the socket can get flattened. With the power off, use a small, non-conductive tool (like a small wooden stick or plastic pick, or even a screwdriver with extreme caution) to gently pry this tab upwards slightly. This helps ensure it makes good contact with the base of the bulb. Be careful not to bend it too far or break it off.
Replacing a Damaged Socket
If the socket is visibly damaged, corroded, or if you suspect it’s faulty after trying other troubleshooting steps, replacing it is often the best solution.
- Disassembly: With the power off, carefully disassemble the lamp to access the socket’s wiring. There will typically be two wires connected to the socket: a hot wire (often black or smooth insulation) and a neutral wire (often white or ribbed insulation).
- Wiring: Note which wire goes to which terminal. The hot wire typically connects to the brass-colored screw terminal, and the neutral wire connects to the silver-colored screw terminal. Unscrew these terminals, remove the old socket, and connect the wires to the new socket in the same configuration. Ensure the wires are securely wrapped around the screws in a clockwise direction and the screws are tightened firmly. Reassemble the lamp.
The Lamp Wiring: The Lifelines of Your Light
Wiring issues can range from simple loose connections to more serious fraying or short circuits.
Checking for Loose Connections at Terminals
Throughout the lamp, wires are connected at various points: the plug, the switch, the socket, and sometimes internal junction points. With the power off, go through each connection point. Gently tug on each wire to ensure it’s securely seated under its screw terminal or within its wire nut. If using wire nuts, untwist them, inspect the wires, twist them back together securely, and reapply the wire nut.
Inspecting for Frayed or Damaged Wires
Carefully examine all visible wiring for any signs of damage. Look for cuts, nicks, frayed insulation, or areas where the inner conductor wires are exposed. Damaged wires are not only a cause of malfunction but also a safety hazard. If you find damaged wiring within the fixture or the cord, it should be replaced. For simple cord repairs, if the damage is minor and in a safe spot, electrical tape might be a temporary fix, but replacement is always safer. If the damage is extensive or near connections, replacing the entire cord or the affected section of wire is necessary.
Advanced Considerations and When to Call a Pro
While many lamp repairs are within the scope of a confident DIYer, some situations warrant extra caution or professional help.
Integrated LED Fixtures: A Different Ballgame
Many modern bedside lamps use integrated LED arrays rather than traditional bulbs. These are often designed as sealed units, and the LEDs themselves are not user-replaceable. If an integrated LED lamp fails, troubleshooting becomes much more limited. Often, the entire LED module or the lamp’s driver (the component that powers the LEDs) needs to be replaced, which can be complex or even impossible depending on the lamp’s design. If your integrated LED lamp fails, check if the manufacturer offers replacement parts or if it’s still under warranty. Otherwise, replacement of the entire fixture might be the most practical option.
Dealing with Hardwired Lamps
Hardwired lamps are connected directly to your home’s electrical system, making repairs slightly more involved.
- Confirm Power Disconnection: Reiterate the absolute necessity of turning off the correct circuit breaker at your main electrical panel. Test with a non-contact voltage tester.
- Wall Box Connections: When accessing a hardwired lamp, you’ll be working with wires coming out of your wall. These are typically standard household wiring colors: black (hot), white (neutral), and bare copper or green (ground). Always connect wires of the same color. Ensure all wire nut connections are tight and secure, and that the ground wire is properly connected to the fixture’s grounding screw (if present).
- Fixture Weight and Mounting: Ensure the lamp is securely mounted to the wall. Over time, mounting screws can loosen, or the fixture’s weight can stress the electrical box. Tighten any loose screws and ensure the fixture is stable.
When to Call a Licensed Electrician
While it’s empowering to fix things yourself, there are times when calling a professional is the smartest and safest choice.
- Uncertainty or Discomfort: If you’re ever unsure about a step, uncomfortable working with electricity, or lack the proper tools, don’t hesitate to call an electrician. Your safety is paramount.
- Repeated Tripped Breakers: If your lamp consistently trips a circuit breaker, even after trying basic fixes, there’s likely a more serious short circuit or overloaded circuit. This requires professional diagnosis.
- Buzzing, Sparks, or Burning Smells: Any signs of arcing, sparking, or a burning smell coming from the lamp or wall should prompt immediate power disconnection and a call to an electrician. These are indicators of dangerous electrical faults.
- Complex Wiring or Multiple Fixtures Affected: If the problem seems to extend beyond a single lamp, or if the wiring looks unusually complex, it’s best to have an expert take a look.
- Hardwired Issues Beyond Basic Connection Checks: If you’ve checked the breaker and the simple connections for a hardwired lamp and it still isn’t working, an electrician can safely diagnose and repair issues within the wall wiring or the electrical box.
Maintaining Your Lamps for Longevity
A little preventative care can go a long way in keeping your bedside lamps shining brightly for years to come.
Regular Cleaning and Inspection
Dust can accumulate inside lamp fixtures, especially in open designs. Over time, excessive dust can interfere with components and even pose a fire hazard. Gently dust the lamp regularly. Periodically, with the power off, give the lamp a quick internal visual inspection for any loose wires or early signs of wear and tear.
Using the Correct Bulbs
Always use bulbs of the correct wattage and type specified by the lamp manufacturer. Exceeding the recommended wattage can overheat the lamp’s wiring and socket, leading to damage or even fire. Ensure LED bulbs are compatible with any dimmer switches you might be using.
Gentle Handling and Secure Mounting
Avoid yanking on lamp cords or switches, as this can strain connections and lead to premature failure. Ensure your wall lamps are securely mounted to the wall to prevent them from becoming loose or falling, which can damage internal components or wiring. Tighten mounting screws periodically if needed.
By understanding these common issues and simple repair tips, you’re well-equipped to tackle most bedside wall lamp problems. Remember, patience, attention to detail, and a commitment to safety are your best tools.